Tuesday 5 November 2013

Tuesday Hair Tip!

Before curling hair, place a small amount of oil evenly throughout your hair and then curl with an iron or curlers.
It is best to use coconut or Moroccan oil. Olive oil can also be used.

www.genuinepeach.com

Saturday 2 November 2013

Thursday 31 October 2013

Thursday Skin Tip!

When you place moisturizer on, PAT it on, don't rub it. Rubbing it takes off your skin and disperses it into different places. This can cause skin irritation and can clog your pores. Patting moisturizer on the face helps your skin soak it up better.

Wednesday 30 October 2013

Wednesday Makeup Tip!

You can grind dried beet chips in a food processor to make your own homemade, natural blush!

Tuesday 29 October 2013

Another Tuesday Tip!

How about another Tuesday tip for all of you beauties out there procrastinating and staying up late for something? Because I sure am not.. *wink wink
No, but seriously. I have too much free time on my hands. And you know I absolutely love giving you advice and hearing all of your positive feedback (which I appreciate very much), so I thought you guys deserved another beauty tip for your rough Tuesday. Hope you enjoy it!

HAIR TIP* Rinse your hair after a shower with 1/10 apple cider and 9/10 water mixed together to cleanse out any residue in your hair and give it beautiful shine and volume! Remember to rinse your hair again with water to get rid of the smell quicker! The vinegar smell doesn't last long, but rinse anyways. You know, just in case ;P

Tuesdays Tip: Quick Pimple Paste!

Sometimes, you need to get rid of pimples quickly. Here's a nice recipe you can use to effectively reduce swelling and redness overnight!
Ingredients 
- Honey
- Lemon
- Baking soda
Instructions 
- Combine all of the ingredients together into a small paste
- Place the paste on the pimple and cover with a bandaid before going to sleep
- Take off in the morning and wash your face. The pimple should have dramatically reduced redness and swelling.
If the pimple is not completely gone, do the same procedure the next night.

Have a fabulous Tuesday!

Monday 28 October 2013

Monday Makeup Tip!

Dip your makeup brushes in rubbing alcohol once a week. Or better yet, dip your makeup brushes in tea tree oil! Get a cup of water, put ten drops of tea tree oil, and then place your makeup brushes in the mixture for 5 minutes. After that, place your wet makeup brushes on a clean, dry towel or napkin. Tea tree oil is a natural disinfectant that helps prevent acne. Your brushes will smell like tea tree oil for a while, but it'll keep it clean.
You can also use baby shampoo and apple cider vinegar!
Have a great Monday!

Sunday 27 October 2013

Wow, Nice Recipes. Where Can I Get These Alien Ingredients?

Hello beauties! I've noticed that some of my posts may have some ingredients that may not be a.. common.. item in your kitchen, like a lot of the essential oils I put on here. But here are some tips on where to buy them for cheap;

- Your local health food store (make sure it's legitimate) 
- There's this one place I go to called Nutrition House. A popular health store chain across Canada.
- Some Asian markets.
- ONLINE. Shopping online is probably the cheapest and best way to get what you want. Especially in my community.. I always like to look for free shipping. 

The whole point of this blog is to find natural and cheap ways to stay beautiful. And I should provide you with some resources on where to get these ingredients. You don't need to worry about this most of the time because I always try to use household foods and kitchen items for my recipes. But you know, just in case. I sometimes get creative ;P

Enjoy your Sunday! And thanks for visiting!  

Another Sunday Post! How about another Face Mask?

If you beauties have been using every single face mask I've posted every single day this weekend, you'd have the skin of a goddess. You have my jealousy if you took the time to do that.
Anyways, I have discovered another beneficial face mask that you might be interested in. This one will lighten up and soften the skin on your face, as well as get rid of blackheads. Remember beauties, the face is the first thing people notice about you. That is, unless you have a gorgeous body... I'm just teasing. You're all beautiful.
Enjoy your double recipe Sunday, beauties!

www.genuinepeach.com
Ingredients 
- Juice from half a lemon
- One egg white

Instructions 
- Beat together the lemon juice and the egg white in a small bowl for a few minutes
- Apply evenly on the face
- Leave on for 30 minutes
- Rinse off with lukewarm water and moisturize.
Voila! You're done.

Here's a tip: Always try to use face masks in the morning or evening. It'd be a little awkward using it in the middle of the day because you'll just mess up your skin routine.
I'll make a post soon for face masks specialized to be used in the morning and the evening tomorrow! Stay updated, beauties!
Have a lovely Sunday!

Two Ingredient Fruity Body and Face Scrub!

Exfoliation is an important skin care routine in order to maintain naturally beautiful skin with an even complexion. Try this super easy body scrub every couple of days to maintain that healthy glow everybody wishes for!
Ingredients
- 1/2 orange
- 4 Tablespoon cornmeal

Instructions
Mix together and apply on skin after taking a shower.  

Done! Wasn't that easy?
Have a wonderful Sunday!

Saturday 26 October 2013

"You Have Jam on Your Face" Facemask!

Hello there! As you've noticed, I'm going on a face mask rampage this week. So if you feel like I'm repeating myself, I apologize. But I believe taking care of the skin on your face is one of the most important things to staying naturally beautiful! I'll switch it up a bit for tomorrow's recipe, but for now, enjoy this wonderful, strawberry face mask!
Ingredients
- 3 or 4 strawberries
- Half a lemon
- 1 tablespoon honey
- 1 tablespoon unflavored greek yogurt

Instructions
1) Mash up a few strawberries in a small bowl.
2) Squeeze the juice out of half a lemon and mix it with the mashed strawberries.
3) Pour one tablespoon of honey into the mixture.
4) Pour one tablespoon of unflavored greek yogurt into the mixture.
5) Mix everything together.
6) Apply evenly throughout your face.
7) Wash off with lukewarm water after fifteen minutes.

VOILA! Done.

Friday 25 October 2013

Friday's Recipe: Coconutty Skin Polish!

Try this coconutty skin recipe to get exfoliated, soft and moisturized skin! We all need a beauty break every now and then. 
Ingredients
- 2 cups organic coconut oil
- 1/2 cup almond or avocado oil

- 1 cup cornmeal  
- OPTIONAL: Add a few drops of rosehip oil. 

Instructions
1) Warm coconut oil in oven in an oven safe bowl. 
2) Put the almond or avocado oil and cornmeal into the bowl. 
3) Blend everything with a hand mixer.
4) Apply evenly on face and body for fifteen minutes.
5) Wash off with lukewarm water.
6) Enjoy beautiful skin!

Thursday 24 October 2013

Thursday Skin Tip!

You all probably know this, but choose to not follow this advice for some unknown reason. Don't feel bad, I was guilty of this myself a few years ago and still break this golden rule every blue moon.
This golden rule is DON'T TOUCH YOUR FACE! 
You get all the dirt on your fingers and underneath your fingernails onto your face, and that will not create pleasant results for your skin. When you have a pimple that you want to get rid of quick, DON'T touch it. Instead, why not use tea tree oil or matcha? Take a little bit of tea tree oil on a cotton swab and tap it on your problem area. OR mix matcha with honey and make a face mask!
Have a stupendous Thursday!

Wednesday 23 October 2013

Wednesday Skin Tip!

Use matcha (a high quality Japanese powdered green tea) mixed with raw honey as an acne spot treatment!

Tuesday 22 October 2013

A Tuesday Skin Tip!

For anybody, it's nice to know these little things that you can do to improve your beauty because every little thing counts!
Try this skin tip
Cut a lemon in half, pour a bit of honey on it, and rub it on your face to get rid of blackheads!

Monday 21 October 2013

Monday Makeup Tip!


Use jojoba oil or almond oil as a makeup remover. Especially for eye makeup. These oils are cheaper than most makeup removers stuffed with chemicals, they work better (for myself personally) and they are more beneficial for your skin. Jojoba and almond oil both moisturize and brighten your skins complexion. So ditch those nasty makeup removers and try a more natural method! 

Monday Skin Tip of the Day!


Before you beauties take a shower, cut an orange in half, bring it with you, and exfoliate your elbows and knees! This will moisturize and brighten those dry and dark areas crying for vitamins.
Have a marvelous Monday!

Sunday 20 October 2013

Rose and Honey Face Mask!

This mask is made for calming down and softening your skin. And by calming down, I mean getting rid of all of that redness, and help get rid of and prevent acne. This is one of those masks that smells delicious and is made for relaxation. So enjoy, beauties!
Ingredients
- 2 tablespoons honey
- 2 tablespoons sweet almond oil
- 5 drops of essential oil of rose
- 1 drop vitamin E oil

Instructions
1) Mix all ingredients together in a small bowl or cup
2) Apply evenly all over face
3) Wash off with lukewarm water
Done! For most people, you don't have to moisturize after applying on this mask because of the almond oil. But if your skin is still feeling a little dry, feel free to apply extra moisturizer.

Benefits 
- Helps with redness
- Prevents and gets rid of acne
- Softens skin
- Anti-aging
- Reduces appearance of scars

Saturday 19 October 2013

Hair Tip Habit of the Day!

Isn't it funny how the littlest habits can give you so much benefit, but yet we're too lazy to do it? Don't tell me you're too busy to waste 3 minutes! You silly gooses.  Most people brush their hair a few strokes and don't even consider proper brushing habits. This brushing habit will literally take less than five minutes out of your day and will benefit your hair for the rest of your life. Enjoy beautiful hair! =D 

Instructions 
1) Lean forward and hold your hair upside down OR bend your waist and hold your hair to the side. This brings circulation to the scalp which is good for the hair. 
2) Stroke your hair 50-100 times and follow each stroke with your other hand to get rid of static electricity. 
3) Voila! You're done. 

Benefits  
Brushing your hair properly helps bring circulation to the scalp, dislodges dirt from the hair, and distributes the natural oils in your hair evenly. This brushing method also brings a little bit of volume to your hair and makes it look healthier!  

Luxurious Rose Bath!

We all have those days where we just want to relax and do nothing. In order to stay beautiful, you must learn to manage your stress. So why not take a bath fit for a queen every once in a while?
This bath is beneficial for your skin and smells spectacular! Give it a try =D


Ingredients
- 1 cup rose petals or 1/2 cup rose water
- 1/2 cup coconut milk

Instructions
1) Ready a warm bath
2) Place coconut milk and rose petals or rose water into the bath.
3) Take a bath.
4) Pat yourself dry, moisturize, and do your thing.

Hope you'll enjoy this delicious bath!
Have a spectacular Saturday, Beauties! =D

Friday 18 October 2013

A Surprising Nightly Face Cleanser!

Hello to all of you beauties out there! You all know how much I love oil (on my face and in my food), and this is a face cleansing method that I absolutely adore. This is called the "Oil Cleansing Method." Basically, you wash your face with oil. Wonderful, isn't it?
Now, before you run off thinking I've gone insane, take a look at the benefits of this method, how it works, and how this miraculous habit leaves you with perfect skin.

Instructions
1) Prepare 2 tablespoons of one of the following oils and a washcloth.
- Almond oil
- Castor Oil
- Grapeseed oil
- Avocado Oil
- Jojoba Oil
- Sunflower Seed oil
(Feel free to mix and match)
2) Wash your face with WATER before applying the oil. You can do this method with a dirty face full of messed up makeup.
3) Gently massage the oil on your face in an upward motion.
4) Rinse off with slightly warmer water.
5) Soak the wash cloth in warm water and hold it over your face for 15 seconds. Then gently pat the oil off.
6) Voila! Your skin is now clean and moisturized!


Benefits
The benefits of this method actually depend on the type of oil you use. However, a lot of these oils have the same benefits for your skin. For example, all of these oils moisturize, help acne prone skin, and cleanse effectively. The oil cleansing method may take your skin about a week to get used to, but you get better results than any other cleansing method I've ever heard of. This method does not strip the natural oils off of your face, but rather replaces the "dirty oil" on your face with the clean oil you are using in this method. AND it takes off makeup.
So this method does the following for your skin;
1) Cleanses the skin
2) Prevents and helps get rid of acne
3) Anti-aging
4) Does not strip skin of natural oils
5) It's an all natural way to cleanse your face!


Thursday 17 October 2013

Message to all Natural Beauties!

Dear beauties,

I will soon be making YouTube tutorial videos once every week on some of these recipes (and new ones to come) to improve your route to natural beauty. I will be posting them on this blog and will create a Channel soon!
I hope you all will enjoy this new addition!

Remember, I post tips and recipes three times a week on Fridays, Saturdays, and Sundays! So stay tuned!

Have a great Thursday! =D

Monday 14 October 2013

Homemade Anti-Aging Essential Oil Moisturizer!

Many of you invest in expensive anti-aging products and have seen no results whatsoever. I can imagine it gets frustrating investing all of that money and getting no positive outcome. And even if you do, there are dire consequences to your skin. This moisturizing and skin nourishing moisturizer is much cheaper than those store bought brands, and on top of that, it brings all of the beneficial ingredients from these chemically infused brands, and puts them into one simple recipe.
And it's not just for anti-aging. It also helps calm down acne prone skin and gives you a glowing complexion!
I hope you all enjoy!
Ingredients
- 8 drops of vitamin E oil
- 1 and a half teaspoons of rosehip oil
- 1 and a half teaspoons primrose oil
- 3 tablespoons almond oil
- 8 drops of rose essential oil

Instructions
1) Mix all of the ingredients together in a bottle that blocks light from getting in. If you are going to use a clear bottle, I recommend always keeping it in a dark place (so it won't spoil).
2) Use every night and shake well before use.
3) Enjoy plump, youthful, and glowing skin!

Tip* If you can't find all of these ingredients, I would say at least mix together the Vitamin E oil, the rosehip oil, and the almond oil for the most benefits from the least ingredients.

All of these ingredients are meant to bring all the nutrition your skin needs in order to maintain a young glow and prevent fine lines and wrinkles. Anybody of any age can use this for the benefits. You will get vitamin E from both the oil and the almond oil, and rosehip oil will give your skin its daily punch of vitamin C and improve your complexion. Every single ingredient has a use for your skin.

Hope you enjoy your new and improved anti-aging moisturizer, beauties!
Have a great Monday!

Sunday 13 October 2013

Homemade, Two Ingredient Pore Strips!

I've personally had some problems in my life with blackheads. Nasty things. But this super easy recipe looks like fun and a cheap and fast way to get rid of them without using those store bought pore strips suffocated with chemicals. So I thought I'd share it with you beauties. I hope you enjoy!
A little bit of a warning, don't use this recipe too often. It's not good to torture your skin. So I recommend once or twice a week tops. Anyways, enjoy! =D
Ingredients
- 1 Tablespoon Gelatin (unflavored) 
- 2 Tablespoons Milk

Instructions
Wash your face for preparation because you'll have to do this quickly.
- Put the gelatin in a disposable cup and pour in the milk.
- Microwave the mixture for 10-15 seconds and quickly apply to face or specific area (It hardens up quickly!)
- Let it dry for 15 minutes
- Peel it off.
Voila, you're done! 

Hope that was fun =D Now enjoy your baby skin and dirt-free pores!

Saturday 12 October 2013

Drink This Smoothie Once a Day to Get Perfect Skin!

Hey beauties,
Sorry for the lateness of my this post. The new school year has been harsh and I just got braces in (which are very pleasant, ha ha ha). I will try to post regularly from now on and will soon start making YouTube tutorials on how to do all of these recipes shown here! I hope you guys enjoy this one and hope it was well worth the wait!
Everybody wants healthy, glowing skin. But to get that, you must start from the inside and work your way to the outside. I've been using this delicious recipe lately (because I was on a liquid diet due to my new braces) and my skin has actually improved. I've done some research and the nutrients found in this smoothies do actually benefit the skin. So I hope you beauties enjoy =D
Warning* Do not make this your main diet. If I wasn't forced to drink smoothies and soup all the time, I would probably eat everything in the house. You can still get the skin benefits by eating healthy, solid foods and replacing one thing in your main diet with this smoothie (of equal amount of calories).

Ingredients
- One cup of Vanilla or chocolate almond milk (Silk is a delicious product)
- 3 tablespoon of vanilla greek yogurt
- 2 tablspoons of honey
- 1 tablespoon Flax seed
- One banana (cut up)
- Three tablespoons of soft tofu

Instructions
1) Put all ingredients in a blender.
2) Turn on the blender until liquefied.
3) Done.
Wasn't that easy?

Benefits
1) Tofu is rich in antioxidants, contains protein, calcium, and healthy unsaturated fats.
2) Almond milk contains a sackful of vitamin E which is extremely beneficial for the skin. It also contains a lot of other nutrients such as protein, magnesium, potassium, and healthy fats.
3) Bananas are rich in vitamins A, B and E and works for an anti-aging effect.
4) Flax seed contains many antioxidants and is the richest vegetable source of omega-3 fatty acids. Therefore very healthy for you and your skin.
5) Greek yogurt contains a lot of protein (twice the amount of regular yogurt), and protein is needed to maintain firm skin, making it more resistant to lines. A serving of greek yogurt everyday will get you a noticeably clearer complexion.
6) Honey is there because it tastes good.

Tip* To get clear skin, drink a lot of water. Drinking lots of water flushes out the toxins in your body and replenishes the water in your cells, and results in a healthy you and therefore, healthy skin.
 
On top of all the benefits, it tastes DELICIOUS! (Note my emphasis on DELICIOUS)

Sunday 22 September 2013

Life Hack: Make Your Own All Natural, Homemade Makeup!

This is a recipe that I have personally used and can say, with all of my confidence, that it works like a charm! So I've decided to share this low cost, beneficial recipe for a bronzer/contour powder with you guys, before you go out and buy an expensive one containing all of those nasty ingredients =D
Ingredients; 
- Cinnamon (good to prevent and get rid of blackheads)
- Nutmeg
- Cocoa
- Baby powder, or powdered sugar.
- Use essential oil for a pressed powder.

Directions; 
Surprisingly, this is very simple to make and I really cannot give you exact measurements for your skin tone.
1) Mix one tablespoon baby powder, 1/2 teaspoon cinnamon and one tablespoon nutmeg.
2) Add in as much cocoa as you need to get your perfect shade. I personally use a little less than one tablespoon.
3) If you'd like a pressed powder, add 10 to 15 drops of essential oil. I would recommend using rose or lavender essential oil.
Voila! Done. Wasn't that easy?

Tip* If you have sensitive skin, I would reccomend taking the cinnamon out of the recipe. It won't change the powder much except that it might be less "sparkly."
Feel free to comment below on how this recipe worked for you! I'd love to hear =D
Have a wonderful Sunday, beauties!


Saturday 21 September 2013

How to Make a Homemade Facial Mist!

I was doing some research on facial sprays and I thought, "Why not combine all of the beneficial properties in facial sprays using only natural, simple ingredient?" So here it is, guys. Knock yourselves out and enjoy beautiful skin!

Ingredients;
- Lemons 
- Oranges 
- Dried Chamomile 
- Rose or Lavender Essential oil 
- Two cups water


Directions; 
1) Place the cut lemons, oranges, and dried chamomile in a large bowl.
2) Boil the two cups of water.
3) Place the two cups of boiled water in the bowl with all the ingredients. Add a few drops of lavender or rose essential oil (this is optional). 
4) Leave the bowl overnight.
5) Strain the mixture and pour (using a funnel) into a spritzer bottle. 
Voila! You have your own homemade facial mist!

Tip* It is best to use this spray in the morning and night twice a day for perfect results!
Tip* You can add infuse rose petals as well for extra benefits! 
Tip* I just thought of this, but why not add a tea bag in there and infuse it for five minutes? I would recommend one of the following;
- Chamomile tea
- Green tea
- Rosehip tea

Enjoy beautiful skin, lovelies!

Tuesday 10 September 2013

Natural Treatments for Dry Skin!

Itchy and dry skin can be very unpleasant, especially if you don't have very oily skin to begin with and winter weather just decides to come along (I'm from Canada, eh). It's very important to have "strong" skin, because it is what protects you from many environmental factors, disease-causing bacteria, and it makes you look pretty if well taken care of.
So what can you do to prevent and treat dry skin? Easy. Just read below ;)


Five Skin Sins That Cause Dry Skin
1) Winter weather - The most wonderful time of the year. Where all the moisture is sucked out of the air and you're left with wonderfully dry skin. I really can't tell you a way to avoid it, unless you got enough money to travel to Florida every winter.. But I can tell you this. MOISTURIZE.
2) Drying off with a towel - Too harsh. Too harsh. Too harsh. If you dry your skin off with a towel right after you take a shower, it strips away your skin's moisture. So try to do a little bit of air drying, please =D
3) Hot Showers - I'm personally guilty of this skin sin. I know it feels awesome just standing in a hot shower, but it really does not do any good for your skin. The natural oil in your skin dries out more quickly when you take hot showers. Try to minimize shower time to 5 minutes, which is enough time to get yourself considerably clean, and use lukewarm water if possible.
4) Heating and air conditioning - Just like winter weather, these two things strip away the moisture from the air in your home and can cause dry skin. My advice? Either turn it down and save some energy or moisturize just like you would in the winter =D
5) Bad soaps - Some soaps just strip away moisture and make you feel like some kind of reptile. Try not to use harsh soaps and shorten your showers. I personally use baby soap because it's so gentle for the skin and gets the job done.

Treatments for Dry Skin
1) Almond oil - This is such a fantastic oil, I feel like a mention it in every single post (I probably do). It moisturizes like crazy and doesn't clog pores. If you'd like to see more benefits of almond oil, click here.
2) Olive oil and Papaya - Olive oil is a wonderful product for the skin, and so inexpensive. The combination of olive oil and papaya as a sort of skin mask for your face or body is wonderful for treating dry skin. You can make a face mask out of this and leave it on for about a half hour.
3) Rosehip oil - Loaded with a ton of benefits for the skin while giving it moisture, this oil is packed with vitamin C and leaves you with a nice complexion. Again, one of my favorite oils next to almond. If you'd like to see its benefits, click here.
4) Jojoba oil - A little bit of this oil goes a long way. Jojoba oil moisturizes skin without clogging pores and is very inexpensive considering you only need a little bit each time you use it.
5) Milk and honey face wash, body wash, "whatever you please" wash - I use this every night and it tastes delicious and works wonders for the skin. Immediately after using it, my skin is as soft as a baby's. Use two tablespoons of honey in a cup of warm milk, and just use it as a facial wash. This wash disinfects as well as moisturizes and softens skin.

Monday 9 September 2013

Natural and Homemade Treatments for Dry Hair!

Yes ladies and gentlemen, it's that time of year again. The season where all the moisture is sucked out of the air, your skin and your hair. I've personally always had trouble with dry hair during the winter and the static electricity is horrible and literally makes my hair float like I'm being hung upside down. But no worries, there are many natural and homemade solutions for this problem. The sad thing is that so many people are unaware of it! I've listed a few homemade remedies that really help regain that moisture in your hair in an all natural, inexpensive way!


Five ways to regain moisture in your hair
1) Egg yolks and olive oil
-  Take one egg yolk and mix it with 1/4 cup of olive oil.
- Apply generously onto hair and scalp and leave on for 30 minutes.
- Wash off with shampoo.
2) Honey, almond oil and rosemary oil
- Mix two tablespoons of honey, one teaspoon of rosemary oil, and 1/4 cup of almond oil.
- Apply generously to hair and leave on for 30 minutes.
- Wash off with shampoo.
3) Safflower Oil
- Massage safflower oil generously onto your hair and on your scalp.
- Leave on for 30 minutes and shampoo as you normally would.
4) Plain Yogurt and Egg
- Take 1/4 cup of plain yogurt and beat one egg into it.
- Apply onto hair and leave in for 30 minutes.
- Rinse off with warm water or shampoo as you normally would if all of it is not coming out.
The fat in the yogurt will moisturize hair and the lactic acid will strip away any dirt.
5) Castor oil, baby shampoo, and apple cider vinegar 
- Mix one tablespoon castor oil with one teaspoon apple cider vinegar and two tablespoons of baby shampoo.
- Lather onto hair and scalp generously. This will treat dry scalp and hair!

TIP* It is best to use these recipes on your hair about two times a week for best results.

On top of adding moisture to your hair, these methods also create a nice shine, keep hair strong and healthy, prevent breakage and even promote hair growth!
Also, feel free to leave comments down below to tell everyone how well any of these recipes worked for you!

Have a lovely day =D

Sunday 8 September 2013

Get Silky and Healthy Hair With This One Ingredient!

Moroccans have been known to use Argan oil for centuries from head to foot (skin, hair, etc), but today it is most popularly used for hair. This miraculous oil can be used to style your hair, to protect it from heat styling, and to boost hair growth and keep it healthy.


Ways to Use Argan Oil for the Hair
1) Styling - When you place a little bit of Argan oil in your hair, it can reveal a nice shine and reduce frizziness. Remember, don't put TOO much because it will weigh your hair down. You can also add Argan oil before curling hair to make shiny and more voluminous curls!
2) Heat Protector - If you place a little bit of Argan oil on your hair before blow drying, straightening, or curling, this will reduce the damage to your hair dramatically (as well as get rid of frizziness).
3) Hair Growth - Argan oil has been known to prevent breakage and promote hair growth. So you can use Argan as a hair growth treatment by rubbing Argan oil generously all over your hair and scalp once a week for an hour and washing it off with shampoo and an apple cider vinegar mixture (100mL of apple cider vinegar per 1L of water). You can see the benefits of apple cider vinegar here.
4) Treatment for Scalp - Argan oil can be used to treat many scalp conditions such as dandruff, seborrhea, dermatitis, itchy scalp and oily scalp. To get effective treatment, massage Argan oil onto your scalp for five minutes 2-3 times a week.
5) Put Argan oil in your shampoo or conditioner - I would prefer placing a bit of Argan oil in my conditioner because this may do more benefit for your hair. This will give you all the benefits of Argan oil without having to go through the process of making a hair mask and washing it off!

Five Benefits of Argan Oil for the Hair
1) Promotes hair growth
2) Hydrates and moisturizes
3) Packed full of essential fatty acids and anti-oxidants
4) Prevents breakage and hair loss 
5) Protects hair from extreme heat due to styling


Saturday 7 September 2013

Purify Skin and Clear Acne With This One Ingredient!

Most people don't know that many of their common kitchen foods could benefit your beauty astoundingly. This is one of the most common kitchen items, in my experience, that is so underused for your beauty and your health that it amazes me that people don't know what they're missing.
Cinnamon is a popular homemade remedy for treating colds and clearing up acne very effectively and in my personal experience, it's been a lifesaver. I've been struggling with blackheads for some time and using the cinnamon skin mask has really helped more than any other product I've used, and I know a lot of people that can say the same. Now I've gotten lazy and the blackheads are coming back a little, so I'll be going back to my "cinnamon routine" once again. But really, give it a try and I promise you won't forget it.


Instructions for achieving the health benefits of cinnamon
- Add cinnamon to homemade dessert recipes or cook quinoa pudding (I will be adding another post soon with the recipe for this marvelous, healthy dessert) and sprinkle cinnamon on it.
- Add peanut butter to apple slices and sprinkle some cinnamon on it as a small snack.
- If you're brave, ingest 1 teaspoon of cinnamon per day. Don't be like her. It will have a very harsh taste, so I'd recommend mixing it with some form of drink.

Instructions for putting cinnamon on your skin
- Mix one teaspoon cinnamon with 3 tablespoons of honey. This makes a quick face mask that will help get rid of blackheads!
TIP* Don't leave the cinnamon mask on for over 30 min as it may irritate skin.
TIP* Don't add more cinnamon than honey. Again, it will irritate your skin. Sometimes too much is not good (like makeup).

Eight Benefits of cinnamon for your health and your beauty! 
1) Helps reduce cellulite with daily use - Mix 1 teaspoon cinnamon with 3 tablespoons honey and rub it on the affected area. To make this even more effective, add half a teaspoon of coffee grounds for the added caffeine which is proven to help reduce cellulite as well!
2) Gets rid of blackheads with daily use - Blackheads occur when there is an oil-buildup on your skin and gets trapped in your pores. This is most common in your T-zone. Make a face wash using 1/2 cup of boiled milk mixed with 5 teaspoons cinnamon and 3 tablespoons of honey and use this every night after steaming your face to open your pores. This will get rid of blackheads effectively and quickly.  
3) Helps lower cholesterol - Cinnamon has been proven to help lower LDL cholesterol (the bad cholesterol). Take one teaspoon of cinnamon a day along with a healthy diet to see results!
4) Treats Acne - Because cinnamon is anti-inflammatory, stimulates the flow of blood to the skin, and is anti-bacterial and anti-viral, it is an effective method for treating acne.
5) Plumps skin - By applying cinnamon to the skin, it brings blood to the surface of the skin making it seem more full and vibrant. This is good for an anti-aging effect.
6) Treats Eczema - Cinnamon has been proven to treat eczema. Add a mix of two tablespoons honey and 1 teaspoon cinnamon to the affected area and you should see results in a week. (Notice how I use different amounts of honey and cinnamon in this combinations for each recipe. Follow these well because it's meant to have a stronger effect for certain treatments.)
7) Decreases inflammation - Cinnamon helps calm down swelled areas by reducing the release of arachidonic acid from cell membranes. This has an anti-inflammatory effect.  
8) Smelling cinnamon helps boost brain function - It's been proving that taking a whiff of cinnamon (don't get it in your nose) can help stimulate brain function and make you think more clearly. I just thought I should put this in since I know this can be useful for school ;D
 

Monday 2 September 2013

Lavender Essential Oil ~ Forever a Natural Beauty

Lavender has a fresh and sweet aroma that has been long used in the production of perfume and other fragrances and can also be used in aromatherapy. The proven benefits of lavender aromatherapy are relaxation and reduction in anxiety and stress.


But along with aromatherapy uses, lavender oil may also be applied directly on the skin to treat minor burns, insect bites and even aid in maintaining your natural beauty due to the following
FOUR Benefits of Lavender Essential oil; 
1) Anti-inflammatory - This is a wonderful property for an essential oil to have. If you are having trouble with your skin's complexion or are having some acne problems, dilute 1/3 lavender essential oil with 2/3 almond or olive oil and apply directly on the skin. This will reduce redness, inflammation, while soothing and calming your skin.
2) Anti-viral and anti-bacterial - This property of lavender oil helps prevent and treat acne while soothes if applied directly onto the skin. You can also use a few drops of lavender oil in a vaporizer filled with water which helps aid a sore throat or a simple cold.
3) Reduces scarring - Lavender oil reduces the buildup of scar tissue when applied to a new minor cut as well as reducing the appearance of scars when used on a daily basis.
4) Increases blood circulation - Lavender essential oil has the ability to increase circulation on the surface of the skin when applied directly. What this does is give your skin a nice fresh glow and slows down the aging process. Use this as a daily body moisturizer by mixing lavender oil with 1/4 jojoba oil, 2/4 (1/2) almond oil and 1/4 lavender oil.

WARNING* Never apply lavender oil directly on the skin by itself. Mix it with at least 1/2 of another base such as almond or olive oil and then apply on the skin. I recommend 1/3 lavender and 2/3 base oil.

Thursday 29 August 2013

A Homemade All-Natural Face Cream!

Beeswax is popularly used in a variety of skincare products and for a good reason. It is a thickening agent that can be used in many homemade skin care recipes without using too much of it and it comes with a vastness of benefits for your skin. On top of being healthy for your skin and cost-effective, it can even give off a lovely honey scent if bought in high quality!
A Simple Yet Beneficial Beeswax Oil Face Cream
Ingredients;
- Beeswax
- Sweet Almond oil

Instructions;
- Melt 10g of beeswax with 120mL almond oil
- After this is cooled down a little, mix this with 40mL of rose water (you can learn to make your own homemade rose water from this link here)
- After this is done, wait for the whole mixture to cool down before applying on your face as either a nightly or daily serum.
- An optional step is to add 5 drops of your chosen essential oil.


And what good will this do for you? Well, here are five benefits of beeswax for your skin;
1) It moisturizes and softens skin.
2) It has anti-inflammatory, anti-bacterial, and anti-viral benefits.
3) Forms a protective barrier on the skin while allowing it to breath (this is especially helpful for sensitive skin).
4) Can treat minor skin irritations and speed the healing process.
5) It is non-allergenic. So this makes it fabulous for sensitive skin!

TIP * Notice in this recipe how almond oil is added. Almond oil is an amazing base for any skin care recipe and adds amazing benefits to the recipe. If you'd like to learn more about the benefits of almond oil, click here.
Warning* Try not to burn yourself making this recipe as beeswax can be flammable and you're working with extreme heat. Use caution!

Sunday 18 August 2013

All Natural Homemade Facial Washes!

In store-bought cleansers, you never know what you're going to get. You read the label that contains a million ingredients that are seemingly written in a different language and which could either destroy your skin or give it a temporary cure. By going natural, you don't risk these extremities (unless you have allergies) and will most likely help your skin rejuvenate itself by using natural ingredients. Here are five ingredients found in your kitchen that you can use to wash your face everyday and get naturally perfect skin!


1) Almond or castor oil - By massaging one of these oils into your skin for 3 minutes and washing it off, you can tighten skin, prevent aging, soften skin, and get a nice radiant glow! You can even apply a little bit of almond oil on your skin before bed and use it as a nightly moisturizer!
2) Milk - Applying milk on your skin everyday for 3 minutes helps prevent premature aging, shrinks the pores, softens the skin, and helps the skin become radiant naturally!
3) Honey - Honey is anti-bacterial and softens your skin while you clean it! Make a honey mask by just applying it for 10 minutes and washing it off before you sleep.
4) Lemon - Cut a lemon in half, obtain all the juices, rub into your skin for 3 minutes, then wash off. This helps reduce and prevent acne as well as lighten the skin and reduce scars and dark marks!
5) Plain yogurt - Yogurt is a natural cleanser that helps detoxify the skin and is also a natural make up cleanser!

Friday 16 August 2013

Dark Eyes Begone!

A majority of us have problems with under-eye circles and bags. So here is a homemade solution that I came across that may help your dark eyes disappear in a matter of minutes and leave you feeling and looking fresh and awake!
FIVE ways to get rid of dark under-eye circles!
1) Apply almond oil directly on the skin around your eyes - Almond oil had moisturizing, anti-aging and skin lightening properties. So apply some almond oil right before bedtime and see reduced dark circles in as little as a month! 
2) Mix ground coffee beans and honey and apply underneath your eyes for 15 minutes - Who said you had to drink coffee to wake yourself up? The caffeine in the coffee literally wakes up the skin around your eyes and stimulates circulation if applied directly on the problem area, leaving your eyes looking fresh and awake!
3) Take used tea bags, lay back, and place on your eyes for 15 minutes - The tea has a similar affect to the coffee due to the fact it has caffeine. It stimulates circulation around the eyes and wakes you up. But if you want to use a herbal tea with no caffeine, this helps reduce eye puffiness and leaves a nice fresh glow after being applied for 15 minutes!
4) Place two cucumber slices on eyes for 15 minutes - We've all heard of the popular cucumber remedy for eye problems, and for a good reason. Cucumbers have anti-inflammatory properties and also moisturize! So use a couple of slices of cucumber and place them on your eyes every morning, and eat a couple while you're at it. 
5) Take two potato slices and place them on your eyes for 15 minutes a day - Potato is known for it's natural skin lightening properties and I have noticed that it is one of the most effective homemade remedies for lightening skin. This will certainly clear up those nasty dark circles!

Wednesday 14 August 2013

All Natural Disinfectant and Beauty Must-Have!

I realize that some people have such bad acne or skin conditions that they have to resort to going to the doctor in order to obtain antibiotics or more severe treatments. And in the end, this fast treatment takes its toll and begins to decrease your immunity. As a result of this, you may accumulate even worse problems than acne, and it may come back full blown once you get off the antibiotics.
Well, before you consider that option, why not try some more natural methods?

Tea Tree Oil
The healing and disinfecting properties of tea tree oil have been known and used by the indigenous people of North-Eastern New South Wales for thousands of years. Tea tree oil is anti-fungal, anti-viral, and anti-bacterial. This makes it a great home remedy for treating infections and acne (I know in my experience it has worked more quickly and better than antibiotics when put on the skin) and is also very inexpensive! A must-have in your bathroom cupboard.

The Benefits of Tea Tree Oil

Ways to Use Tea Tree Oil
1. For applying directly on the skin.
2. As a household cleaner and disinfectant.
3. As a mouth wash.+
4. For your hair.

How to use tea tree oil for the skin
To use tea tree oil for the skin, you may do one of the following (as suggestions);
1) Dilute the tea tree oil with jojoba, almond, or olive oil by a 50:50 ratio. Then apply on skin where desired (avoid sensitive areas like the eyes)
2) Take a Q-tip and apply full strength tea tree oil only on problem areas like pimples.

How to use tea tree oil as a household cleaner
Take a spritzer bottle and dilute tea tree oil in water in a 1:50 ratio (1 mL tea tree oil for every 50mL of water). Spray this solution as an all natural disinfectant!

How to use tea tree oil as a mouthwash
Take one cup of water and mix it with 5 drops of tea tree oil. You may add in 5 drops of peppermint oil as well if you wish. This kills the bacteria in your mouth that causes bad breath! Be careful not to swallow any!

How to use tea tree oil for your hair
To use tea tree oil for your hair, you can mix it with your daily shampoo or rub tea tree oil mixed with jojoba or almond oil in a 50:50 ratio onto your scalp. Tea tree oil helps prevent hair loss, brings circulation to the scalp to stimulate hair growth, and leaves your hair moisturized and shiny.

WARNING
- Tea tree oil should by NO means be ingested because it is toxic.
- It may cause slight skin irritation and redness when you put it on full strength. But that fades away in no more than an hour (15 min in my experience).

Monday 12 August 2013

Sunscreen Worse Than Sunburn?

I was doing some research online and came across an article about natural homemade sunscreen. If you keep up to date with my blog, you should know that I'm a HUGE fan of homemade recipes. I thought I should share this miraculous discovery with you guys because this is really something that can take years off of your skin, prevent harmful effects of sunscreen, and also give you another reason to not put chemicals on your skin.
First of all, I'd like to point out some dangerous effects of using store bought sunscreen that I didn't even know of until today. I've done some research on this and it was mind-blowing to me. You hear all this talk of "You'll DIE if you don't use sunscreen, blah blah blah." But did we even consider the harmful effects that sunscreen has? I agree that we should not get TOO much sun, but should we really push the limits this far and become modern day vampires suffocated with chemicals?
Most sunscreens contain the chemical oxybenzone, which penetrates into the skin and has been linked to causing low birth weights when used by pregnant woman. Along with this chemical, sunscreen companies use nano particles to make sunscreen less chalky, and if inhaled can cause horrible consequences. One of these nano particles is titanium dioxide, which is a carcinogen found among many spray-on sunscreens. These spray on sunscreens make it even easier to inhale these nanoparticles and allow it to enter your bloodstream because your lungs cannot properly filter out nano particles. Oh, and did I mention that there have been cases where people have used spray on sunscreen and have received pleasant third degree burns? Yeah, not appealing.
In addition to the chemicals that it contains, sunscreen use drops your vitamin D intake DRAMATICALLY. Especially if you don't get enough vitamin D through your diet.

Now back to the homemade recipe. Hopefully after reading this article, you'll consider taking store-bought sunscreen out of your daily skin care and switch to a more natural alternative.

Ingredients
- Shea Butter (Provides 5 SPF)
- Two tablespoons Zinc oxide (not in nanoparticle form) or 1/4 cup of diaper rash cream which contains zinc oxide. (Provides around 20 SPF)
- 1/4 cup beeswax
- 1/4 cup almond oil
- Two tablespoons coconut oil
- Two tablespoons aloe vera gel

Instructions
1. Mix all of the ingredients together into a glass bowl or measuring cup.
2. Place the glass bowl into a pot with enough water in it to cover 5cm or so of the bottom of the glass bowl.
3. Bring the water to a boil and allow the ingredients to melt together, stirring occasionally.
4. Turn off the heat, wait for the mixture to cool down, and voila! You have your natural homemade sunscreen to use at will.

Overall, this natural homemade sunscreen provides 20-30 SPF. Enjoy!

Tuesday 6 August 2013

The Natural Make-It-Yourself Face Toner!

Rose water is one of those unknown and underrated miracle workers that can be used as a nutritious drink and is one of the best natural skin toners that you can get on the market today. Though it is not readily available and can be expensive, there is a way to make this miraculous liquid (with basic, natural ingredients) right in the comfort of your own home with very little cost. This all natural toner contains vitamins A and C, is bursting with antioxidants, and helps stimulate circulation in your skin leaving a nice healthy glow. If used on a regular basis, it would help improve the overall complexion and health of your skin!


How to Make Rose Water
I normally get criticized by my brother for boiling roses that I receive as gifts. I generally don't boil them when they're fresh out of guilt and because they look so pretty, but I tend to do it when they're getting old before they lose their fresh beauty. DON'T do this if you want the best quality rose water. Try to get newly picked roses, if possible.  

1. Once you have your roses, pick off all the petals. I normally use about 10 roses for a bottle of rose water. 
2. Put the petals in a bowl and rinse them off. Get off any impurities.
3. Get a metal pot and put about half a liter of water in it. Place the roses in the pot.
4. Place a lid (preferably a glass one) on top of the pot UPSIDE down. Place ice cubes on top of the lid. This allows the evaporated water to condense and make the rose water even more potent. 
5. Bring the rose water to a boil, and then put it on medium heat. Leave it for 25-30 minutes. Make sure to check on it and replace the melted ice cubes.
6. Take off the heat, remove the lid (CAREFULLY), and voila! You have your rose water.

How to Use Rose Water For Your Skin
1) Wash your hands with soap and water.
2) Wash your face of any impurities.
3) Place rose water in cupped hands and rinse your face with it.
DONE. Do this daily and expect naturally beautiful skin!

Friday 26 July 2013

How to Look Beautiful With Five Easy Steps!

I know, this seems too broad a topic, and it goes against the whole purpose of my blog which is giving you homemade remedies on how to help your external beauty. However, I thought that it is very important that I should put it out there so you, the visitor of my blog, can know what I believe true beauty is. It's not about having a giant bust, or perfect hair and skin, or expensive clothing. It's about being yourself and being confident in who you are. It's about exaggerating what you like about yourself and improving what you don't like. That doesn't mean you should shove it in people's faces (always mind your modesty). But it means embracing who you are and always finding ways to improve yourself.
So for this post, I'd like to give out some tips on how to stay confident and look the best that you can. Happiness makes you the prettiest person in the world!


Five Tips on How to Look Beautiful;
1) Always Smile - A smile can make anybody's day and it expresses what kind of person you are. You will attract people to you just by your upbeat look and confidence. And I know it's hard to smile sometimes, but smiling even when you're feeling down can help improve your mood overall by "tricking" yourself to be happy. So always find opportunities to smile =D
2) Always be kind - In my opinion, if I were to meet the most physically attractive person in the world and find out that they're rude, my interest would just go down to nothing. And a lot of good and trustworthy friends I've met throughout my entire life would completely agree with me. Being nice to others is always an attractive quality and it radiates your good qualities inside and out.
3) Be healthy - Being healthy and staying in shape is a major stepping stone in order to be the best that you can be and in finding happiness and confidence. Try to find little ways to be healthy, such as cutting out junk food, going for a walk everyday, incorporating fruit and veggies into your diet a little bit at a time, etc. It's the little things that count.
4) Find clothing that compliments your figure - Before people get to know you, they normally judge you based on what you wear and how you present yourself externally. It's just the way the world works. So try to find something you like that exaggerates your good qualities and tucks away the ones you dislike, but within appropriate means. Try to lean away from exposing yourself TOO much (if you know what I mean) because you will get the wrong kind of attention..
5) Stay CLEAN - I cannot say this enough, especially for kids going through puberty. Take a shower everyday, brush and floss your teeth, use deodorant, and keep your nails nice and neat to maintain a fresh countenance. By doing this, others will know you take good care of yourself.


Wednesday 24 July 2013

Homemade Mask for Healthy, Silky Hair!

Everybody has their bad hair days. You get up in the morning, look in the mirror, and notice that your hair has just decided to be dull before school, work, or a big event. But there's a simple solution that can minimize the amount of these treacherous days and also get rid of them altogether by simply using an hour of your life 3 times a month. This is done by using a natural, homemade hair mask that basically costs cents to make.


Ingredients; 
1) One or two eggs, depending on how long your hair is.
2) PLAIN yogurt, preferably organic. Add around 3 tablespoons.
3) Rosemary Oil, Almond oil, or Olive oil *Be creative with this one. I personally prefer rosemary oil because it has the most benefits, but any other works just as excellent. Add about 3 tablespoons of this.
4) Honey =D My favorite. You need about 5 tablespoons of this miraculous sweetener.

Instructions for making the hair mask; 
1) Take two bowls. One large one for the hair mask and one smaller one for the egg yolks.
2) Take eggs and crack them open. Separate the egg yolks from the egg whites. You are going to be using the egg whites for this hair mask. Discard the egg yolks (put them in the bowl for convenience while cracking the eggs).
3) Add all the other ingredients in and whisk it all together with a fork.
4) Voila, you have your hair mask!

Instructions for applying the hair mask; 
1) Apply the hair mask generously throughout your hair and scalp while brushing your hair with your fingertips.
2) Put a plastic bag over your hair and wait 20-40 minutes.
3) Take a shower and rinse it out. Apply shampoo to get rid of the oil.
4) Enjoy silky smooth hair!

TIP* For even better results, rinse out your hair after your shower with a liter of water with 100mL of apple cider vinegar. This leaves your hair even smoother and more voluminous.
TIP* Use this hair mask no more than once a week.

Monday 8 July 2013

Get Rid of Pimple Redness Within an Hour!

As a teenager, these are one of the most annoying and reoccurring things in day to day life. Especially before an important event or just heading out and accidentally running into your crush with a big red spot on your face. Here are a few natural and easy ways to get rid of pimples and redness.

But first, a few important tips; 
1) You've heard this a million times and most likely have ignored this warning (I'm personally guilty as well). DON'T TOUCH YOUR FACE. It ALWAYS makes it worse. Just don't do it. Don't.
2) Apply ice to the affected area. It reduces swelling and redness. I like to use a kind of freezie ice cream to make it more fun. Just because. 
3) Wash your face two times daily with a face wash. It is best to use these treatments after you have washed your face. 

4 Awesome Things That Get Rid of Annoying Pimples; 
1) Stuff with caffeine - My favorite is coffee. But tea will work as well. Mix used ground up coffee beans and  honey. You may apply it to the affected area or all over your face. It reduces redness and swelling and contains with many other benefits for your skin as well. 
2) Oregano Oil - Apply a small amount directly to the affected area. Do NOT spread on face unless mixed with some other oil such as almond or olive. Oregano is proven to reduce swelling, redness, and is anti-bacterial.
3) Tea Tree Oil - It smells bad to most people, but it works quick. Apply it to the affected area and only the affected area. Tea tree oil is anti-bacterial and proven to work against acne, swelling, and redness. 
4) Eye drops - Eye drops reduce redness and swelling temporarily on the skin the same way it does for the eye, by constricting the blood vessels. Note, this is only TEMPORARY. But it should last for several hours and is a quick fix before heading out.

Thursday 27 June 2013

Revitalizing Body Scrub!

    Skin is one of the most important things to maintain to achieve outer beauty, and I adore talking about ways to increase the potential your skin has for being flawless. This recipe is a relaxing and rejuvenating way to take a shower or a bath and know that when you come out, your skin will feel refreshed and have a nice glow to it. This is a recipe that combines all the ingredients that your skin adores!
Ingredients;
1) One cup of brown sugar
2) 1/3 cup of Almond Oil 
3) 1 teaspoon vanilla extract
4) 3 tablespoons of cinnamon 
5) 1/4 cup of ground coffee
6) 10 drops of Rosehip oil (Optional) 

Instructions;
1) Mix cinnamon, ground coffee beans and brown sugar together in one bowl. 
2) Mix the vanilla extract, rosehip oil, and almond oil together in a separate bowl. 
3) Mix the two bowls together, and voila. You have your scrub. 

6 Ways This Benefits Your Skin; 
1) The caffeine in the coffee tightens and awakens your skin, it also helps get rid of stretch marks and scarring. 
2) The almond oil has multiple benefits in itself. It is anti-aging, it lightens and tightens skin, moisturizes, and makes your skin soft and smooth.
3) Vanilla extract smells delicious and is proven to help relieve cuts and burns (you really should not be using this scrub directly on a cut or burn, but it's a nice fact to know). The main reason is that it smells delicious.
4) Cinnamon is proven to help acne and plump skin because it brings blood to the surface of the skin. Warning* If you have an allergy to cinnamon or sensitive skin, it's best to not use cinnamon in this recipe. 
5) Brown sugar and coffee exfoliates skin and leaves a nice smooth touch. Exfoliation also helps create even toned skin and get rid of ingrown hairs. 
6) Rosehip oil has multiple benefits as well. It contains a punch load of vitamin C and is anti-aging. This is an optional ingredient, but highly recommended.

TIP* If you would like more information about some of these ingredients and their benefits, click on the links added to the ingredient list. 
TIP* It is not recommended to use this scrub everyday, because over-exfoliation will do more harm than good. You need to allow your skin to "heal." 

WARNING* I've mentioned this before, but in case you guys didn't read the entire post, DON'T use cinnamon if you have sensitive skin because it is an irritant.
WARNING* Do NOT use this on your face because the skin on your face is more sensitive than on your body. 

Monday 10 June 2013

Natural Makeup Remover and Homemade Nightly Moisturizer!

Almond oil. I've mentioned this before, and I will mention it again. I may have briefly skimmed through the benefits of almond oil and how it can be used as the best makeup remover ever, but I just thought I should dedicate a post for this because everybody should know about it . Almond oil is the most effective makeup remover I have ever used, especially for eye makeup. And on top of that, while you are removing your makeup, it is benefiting your skin by acting as a dark circle and scar reducer. Consider almond oil before you buy those chemical infested makeup removers!


To use almond oil as a makeup remover, follow these three simple steps;
1) Wash your face and keep it damp.
2) Place the almond oil generously on a cotton pad.
3) Remove your makeup.
Simple as that!

Now, after you remove your makeup and before you hop off to bed, you will want to put something on your skin to keep it hydrated and repair it from any damage it may have received throughout the day. This is where the wonderful ARO comes in. No, it is not a skin care product you can buy in the store. Instead, consider these three words; Almond, Rosehip, and Oregano. This is a moisturizer you can make in the comfort of your own home with all natural, simple ingredients that do wonders for your skin. In my opinion, this is much better than any expensive moisturizer you can get with a million alien ingredients in it.

Ingredients for ARO
1) Almond oil - 5 drops
2) Rosehip oil - 3 drops
3) Oregano oil - 1 drop
Optional - 1 drop vitamin E oil

Five Amazing Benefits of ARO for your skin!
1) Anti-aging and provides elasticity
2) Improves overall complexion
3) Prevents and decreases acne (anti-bacterial)
4) Gets rid of dark spots, dark circles, and scars over time
5) Gives your skin a huge punch of vitamin C

Tip* ALWAYS apply any moisturizer (especially almond oil based) to a DAMP face.

Tuesday 28 May 2013

Stinging Nettle, An Edible Weed

Stinging nettles are an unknown herb that is very common among Europe and North America and are seen as a bothersome weed in your yard or at local parks. However, what people don't know is the amazing health benefits and the easy accessibility for which you can obtain this herb. It can be ingested as a tea or a cooked to look and taste much like spinach. This herb contributes to many health problems as well as can enhance your beauty in the sense of obtaining that healthy glow.
stinging-nettle-what-are-stinging-nettle-health-benefitsc-medicinal-values-of-stinging-nettle-stinging-nettle-good-for-health-health-benefits-of-stinging-nettle.jpeg
Firstly, before you jump to shoving stinging nettles down your throat, here are some VERY important warnings you should know before ingesting stinging nettles.
* You MUST cook or boil YOUNG stinging nettle before ingesting. The reason for this is because young stinging nettles have not fully developed their "stingers," so it is easier to get rid of that hurtful acid on the plant, which has the same molecular structure as ANT ACID. But if you cook or boil it, that will get rid of it completely and it'll be like it was never there.

Seven Amazing Health Benefits of Stinging Nettles;
1) Contains High Amounts of Protein, Iron, Magnesium, and Calcium - All of these components are essential for maintaining healthy bones, skin, hair, and nails. It also supports the nervous system!
2) Treats Allergy Symptoms - Anti-inflammatory compounds as well as flavonoids contained within this plant reduces the amount of histamine in the body, therefore reducing the symptoms of allergic reactions and providing you relief in a natural, non-medicinal way!
3) Digestive Aid - Stinging nettle contains a natural diuretic which helps the kidney retain less water and supports urination, which may help get rid of kidney stones. As well as supporting urination, the stinging nettle also cleans and supports the digestive tract.
4) Prevents Hair Loss - Stinging nettle, most commonly used in oil form for this purpose, is used to stimulate and support hair growth as well as prevent hair loss. The oil may be applied to the scalp right before bedtime and rinsed off in the morning with shampoo, repeating this every one or two days. Along with this treatment, ingestion of stinging nettle tea or the cooked herb also helped support hair growth. With this treatment, results should be seen within several months.
5) Lessens Symptoms of PMS - This herb detoxifies the liver as well as reduces bloating and breast tenderness. This contributes to the lessening of the annoying symptoms that may come along with your time of month.
6) Great for your skin! - Stinging nettle benefits your skin by removing the toxins in your blood and contributing to heightening your iron intake. Good blood equals good skin everybody!
7) Antibacterial and Antiviral - Along with supporting your immune system and your overall health, stinging nettle is also proven to have antibacterial and antiviral properties, which prevents you from getting sick or helps deal with infections and colds.

Friday 10 May 2013

Beet Beauty!

Since ancient times, beets (specifically their juices) were used for multiple homemade recipes to treat various diseases from blood to digestive disorders. Now, with modern science, these claims on the amazing health benefits of beets have become a fact. And with these amazing health benefits, along with their amazingly cheap price in the grocery store, beets can be used for their dying properties for external beauty uses!
Before I jump to conclusions and just give you the tips on how to smother beet juice on yourself, let's list some health benefits that keep your internal body delighted.
5 Benefits of Drinking Beet Juice;
1) They are anti-inflammatory
2) They lower blood pressure
3) Contain anti-carcinogenic properties
4) Contains phosphorus, iodine, iron, protein, potassium and vitamins A, C, B2, B1, and B6.
5) Contains anti-oxidant properties

TIP* If you plan on drinking pure beet juice, please drink in moderation. They are known for their detoxing properties and you may not want to drink too much of it. About half a cup a day should be the maximum.
OH, and by the way, they're sweet! =D

How to Apply Beet Juice for Beauty;
As I mentioned before, beets stain very well. I personally used this recipe and the redness stays on my lips literally all day long! This recipe is very simple to make and includes a lot of optionals.

How to extract the juice:
1) Get rubber gloves and an apron, or you'll stain your clothes in a blood-like color. Not a very good impression..
2) Cut the beet in half, and either put it in a juicer (easier option) or get a cheese shredder and start shredding the beet as you would mozzarella.
3) If you used the cheese shredder option, pick up the beet remains, put it over a bowl, and squeeze all the juice out of it. If you used the juicer, voila! You're done!

Now that you have the juice, what can you do with it?
Option one: You may just apply it to your lips, as is, and it'll stain wonderfully!
Option two:  Mix the beet juice with a bit of almond oil and lemon juice to help preserve the color and hydrate your lips! Then apply on lips for same effect as option one, but healthier and longer-lasting.
Option three: Add some beet juice to Vaseline to get a red lip gloss!

What else can you do with the juice other than use it for your lips?
Well, I'm glad you asked.
Option four: Drink it! Beet juice is very good for you and will maintain your healthy glow!
Option five:  Use it as a blush. You can dehydrate beet slices and then crush them in a coffee grinder to form a traditional powder blush! Or you can just apply the liquid to your skin, but VERY moderately and evenly. It takes some practice, but you'll get the hang of it =D

Tuesday 7 May 2013

Say Bye Bye to Sunburns, Naturally!

It's that time of season again, and annoying sunburns are back. Most of us are guilty of going out and "tanning" to get that "nice healthy glow". Then you come back looking like a lobster. Everybody should be aware of all the damage your skin is going through when exposed TOO much UV rays. A little bit of sun does wonders for your health and your skin, but you must limit your exposure. Sunburns increase your chance of all sorts of skin related diseases (most popular one in the media is skin cancer), as well as age your skin. Remember to put on sunscreen before going outdoors.
And if you ignored my advice completely, here are some natural homemade remedies to replenish your sunburned skin and get it back to a normal colour, faster =D

Three Natural Homemade Treatments for Sunburns 
1) Aloe Vera - First of all, Aloe vera gel is a natural sunscreen and is known for its healing properties for burns. This will reduce swelling, redness and also accelerates the healing process along with removing the itchiness of the typical sunburn. This is definitely the miracle plant in a delicate case such as this.

2) Apple Cider Vinegar - Apple cider vinegar is a natural disinfectant and a marvelous tool for reduction of swelling and redness. It also makes your skin evenly toned and can be used as a daily face wash if diluted in water. For use of sunburns, add about 100mL of apple cider vinegar to your bath and soak in it for 15-20 minutes. It will smell for a while, but it evaporates quickly not leaving a trace of the vinegary smell.


3) Lavender Oil - Lavender oil is wonderful for calming skin and reducing redness. Add several drops of lavender oil to a cool bath and soak for about 20 minutes. Afterwards, moisturize your skin gently and stay hydrated.

Extra #4) Milk works as a nice relief for sunburns and soothes the skin. However, I would personally recommend Aloe Vera as a more effective, natural tool for sunburn relief. If you don't happen to have Aloe Vera on you, use milk instead.

Tips*
- Drink plenty of fluids and keep yourself hydrated.
- Apply moisturizer, such as almond oil, or Aloe Vera often so as to keep your skin moisturized. Your skin is begging for nutrition when it is sunburned, so take advantage of that.
- Use gentle shower gels and NO scrubs whatsoever.
- Take cool baths or showers.
- STAY OUT OF THE SUN! And after your sunburn has healed, learn your lesson and minimize your sun exposure to a healthy amount. Red and wrinkled skin is not attractive at all. Know your risks and stay safe =D


Monday 29 April 2013

Foods for Easy Beauty Maintenance!

Typically, people tend to focus their attention on how to make themselves beautiful on the outside by slabbing on makeup, doing their hair, painting themselves, whatever it takes, you know? They don't take into consideration all the effects that it is having on the health of their hair and skin as well as the food they are ingesting in order to maintain this health. I believe the most beautiful people are the happiest and healthiest. And what better way to change your lifestyle for the better, and get healthy hair, skin, and nails in the process, than eating better and just adding a few good habits into your daily routine?
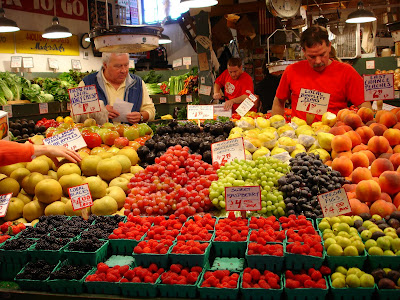
Here are 12 miracle foods that are beneficial to your health and beauty;
1) Green tea - This drink contains antioxidants, is believed to reduce your risk of cancer, keeps you hydrated, is known to support weight loss by boosting your metabolism, and helps you combat aging.
2) Quinoa - Contains a ton of protein and has all of the nine essential amino acids our bodies need, and contains iron, fibre, magnesium, manganese and riboflavin. All of these benefits of quinoa make it one of the top miracle foods, especially for vegetarians or vegans that need that extra protein and iron.
3) Chia seeds - This miracle food is thought to be the weight loss dream. It helps you feel full for hours due to the fact that it forms a gel coat when exposed to water. It also has antioxidants, omega fatty acids, proteins, stabilizes blood sugar, provides protein and a ton of other benefits. Definitely a must have.
4) Greek Yogurt - Greek yogurt contains protein, calcium, it contains less lactose (which is helpful for people who are lactose intolerant), and it is delicious! This is a excellent food to have in your daily diet.
5) Black Beans - This food provides support to your digestive system, regulates blood sugar, maintains cardiovascular health, and are high in protein, antioxidants, folate and fiber.
6) Flax Seeds - This is thought to be the ultimate wrinkle fighter, due to the fact that it contains omega-3 fatty acids and is a key against inflammation within the body. It also contains a high amount of fiber. This miracle food will help reduce your risk of cancer, heart disease, asthma, and diabetes.
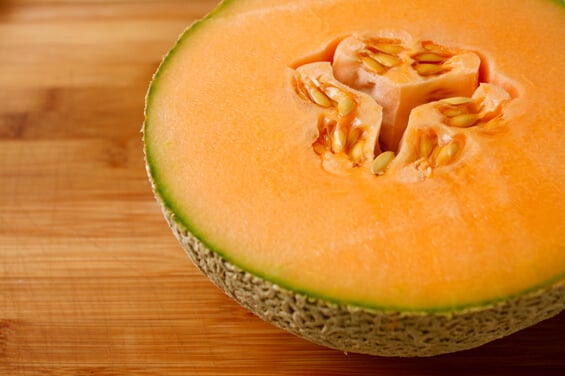
7) Cantaloupe - Cantaloupe contains a payload of Vitamin A, postassium, and vitamin C and makes it a wonderful source for maintenance of beautiful skin.
8) Kale - Kale contains antioxidants, as well as a packload of Vitamin K, A, C, and B6, magnesium, and calcium. And all with a low amount of calories.
9) Tomatoes - This miracle food contains folate, vitamin C, A, K, is low in calories, fat free, and also contain thiamin, niacin, vitamin B6, magnesium, phosphorus and copper, all are essential for good health and is contained in just this one food. On top of that, they are delicious! 
10) Blueberries - Blueberries are rich in antioxidants, lower the risk for a large range of cancers, been proven to preserve vision, lowers the risk of Alzheimer's, and aids in weight loss.
11) Almonds - Almonds contain manganese, vitamin E, magnesium, tryptophan, copper, vitamin B2 and phosphorus, lowers cholesterol, and reduces your risk of heart disease. Almonds help you maintain nice skin due to its abundance of vitamin E.
12) Spinach - This food contains antioxidants, is anti-inflammatory, anti-cancer, contains vitamin C, vitamin A, vitamin E, beta-carotene, manganese, zinc and selenium, effectively lowers blood pressure, is good for immunity and vision, and promotes healthy skin.
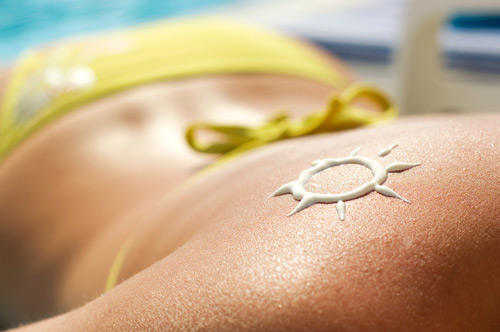

Sunday 21 April 2013

The Unknown Miracle Herb!

Borage

A beautiful flowering plant that grows in the Mediterranean, Borage is one of the unknown miracle herbs that are widely available for growth in North America. This herb contains a wide range of benefits in such small amounts, and is such an easy plant to grow and maintain, it is remarkable why it is not used more extravagantly.  


5 Benefits of Borage;
1) Contains essential fatty acid gamma-linolenic acid (GLA) - What this fatty acid can do to contribute to your overall health is maintain healthy and beautiful skin, restore joint health, and even raise your immunity. 
2) Have very high levels of Vitamin A and C - Vitamin A in itself has numerous benefits for your health, and is thought to be one of the main vitamins to maintain healthy and beautiful skin. This will protect against aging of the skin and give you a healthy glow. Vitamin C is shown to contribute to the wellness of your skin and immunity as well. 
3) Contains minerals like iron, calcium, potassium, manganese, copper, zinc, and magnesium- These minerals contribute to your overall health. For example, Potassium helps control heart rate and blood pressure (also alleviates cramps), Iron is important for cellular metabolism and is a main component for hemoglobin, which carries oxygen in the blood. 
4) Anti-inflammatory - This property of Borage is most commonly used in its oil form. It may be used to treat acne and studies have shown that it has a good possibility of treating arthritis.
5) Has sedative effects - This can be used to sooth nervous conditions and is known to ease depression and mood swings. 

FACT* The Borage flower is one of the only naturally blue edible plants in the world. It has a sweet taste and can be used as a sweetener and decoration for tea or on top of pastries. 

Borage also comes in the form of an oil, which is one of the "must haves" for natural youth and beauty maintenance. Although it is a bit pricey, it is well worth the cost and can last you a couple months, even if used on a daily basis. That really beats having to buy expensive moisturizers that last a couple weeks to a month, which may have little to no impact when comparing to the benefits of Borage oil. 

I've personally tried to grow this plant from seed and it has worked like a charm. As long as you provide them with some light and water a little bit daily, they grow with little assistance and maintain strong seedlings.

Monday 15 April 2013

Tips For Naturally Kissable lips!

Dehydrated lips are one of the most annoying things in the world. You feel as if there is a constant bother on your face and small habits formed by these bothers, such as biting or licking your lips, just worsen the condition. In the end, you end up with chapped, unmanageable lips that just refuse to respond to your daily treatment of lip balm.These are absolutely MUST know tips and must have ingredients in your household to maintain perfect, kissable lips cheaply, naturally, and effectively.   
First off, some tips. Because treatment will not be as effective if you refuse to change some habits.


5 tips for healthy lips;
1) DO NOT bite or lick your lips - This is something that you should NOT do. Avoid buying flavored lip balms because this will just tempt you to lick and bite your lips even more. Saliva evaporates quickly and will leave your lips even drier than they were before, and biting or picking will damage the delicate skin. 
2) Stay hydrated - Drink lots of water. This will not only hydrate your lips, but your entire body. A good way to stay healthy is to drink two liters of water a day. 
3) Apply lip balm or Vaseline before applying on lipstick - Some lipsticks can dry out your lips and leave them worse off than they were before. Applying on some kind of moisturizer before applying lipstick will prevent damage, leave your lips hydrated and much better off than bare lipstick. 
4) Wear a scarf in the winter - Cover your mouth with the scarf to prevent any harsh cold wind from further drying and damaging your lips. 
5) Breathe through your nose - Breathing through your mouth dries out your lips. Also, breathing through your nose is actually proven to be healthier for you since your nasal passage filters the air that you breathe.

Here are three basic ingredients that you must have in order to maintain soft, hydrated lips;
1) Petroleum Jelly (Vaseline) - This works wonders for your lips. You may even apply it on top of your lipstick or on bare lips to give it a nice shine and effectively give your lips the hydration that they need to stay beautiful and young. 
2) Honey - May be applied every once in a while to rejuvenate and hydrate your lips (can also be applied to face, check out my other article on the benefits of honey). 
3) Coconut oil or almond oil - I tend to use almond oil because it always works for me. But research states that coconut oil is very beneficial in the hydration of lips if used in MODERATE amounts. Do not apply too much at a time as this can worsen it. Nevertheless, it does wonders if applied correctly. 

Wednesday 10 April 2013

Rosehip Oil, Great for Skin and Your Health!

This is an essential oil that I would definitely recommend using for aging or acne prone skin. Rosehip, the fruit of the rose, can be made into many things, such as tea and jam (my favorites) and is very beneficial for your body inside and out. Rosehip is a natural source of vitamin A, vitamin C, and essential fatty acids such as Omega-3, 6 and 9 as well as packed with antioxidants that can do wonders for your skin and for your health.
Rosehip oil may be applied on the skin every night before you go to bed in order to increase elasticity of the skin, repair sun damage, and reduce and prevent acne.

Here are 5 benefits of rosehip oil when applied directly on the skin;
1) Increases skin elasticity and is anti-aging
2) Deep hydration for all skin types
3) Reduces acne
4) Repairs sun damage and reduces appearance of scars and stretchmarks
5) Tones and makes skin glow

3 Benefits of Rosehip for the BODY;
1)  Great source of Vitamin A and C
2) Contains fatty acids such as Omega-3, 6, and 9 which are essential for the skin's beauty
3) Contains antioxidants

*I recommend putting rosehip jam or tea into your daily diet to increase your health and your beauty. One small warning.. rosehip jam is extremely sweet. If you have a sweet tooth, like me, you will absolutely love rosehip jam on a piece of toasted whole wheat bread in the morning =D

Monday 8 April 2013

Super Easy All Natural Hairspray!

Aren't you sick of all the chemicals, the horrible smell, and the money it takes to just keep you hair voluminous, beautiful and in order? On top of these temporary effects of hairspray, it can also impose long term damage on your hair if used often. Try out this homemade hairspray recipe that you can use as much as you want without inflicting any damage on your hair whatsoever. 
This is one of the easiest homemade recipes that are ever going to be posted on this blog, and it is sugar hairspray. Honestly, the name says it all. It is hairspray that is made by dissolving sugar in water, and in my opinion, works better than any hairspray you can buy in the store. It is easy to use, easy to make, and VERY cheap. And when you compare it to the hairsprays you buy in the store, it is much more healthy to use and reduces the amount of chemicals going down your drain when you wash your hair, so thumbs up for environmental concern =D

You will need the following ingredients;
1) Water
2) Sugar
Everybody has these in their household.

Instructions;
1)Boil a cup of water
2) Add 3-5 tablespoons (this is what I use) of sugar in the water.
3) Wait for it to cool, add in a spritzer bottle, and use like regular hairspray.

I use this hairspray on a daily basis and it works like a charm. You can also add essential oils to make this spray even more beneficial for your hair or just for a nice scent.